How do I edit the contact information?
Sometimes your contact information changes, you may have moved offices or had a completely new telephone number. Any of this information is completely controllable by yourselves. There are 3 main areas to alter your contact information:
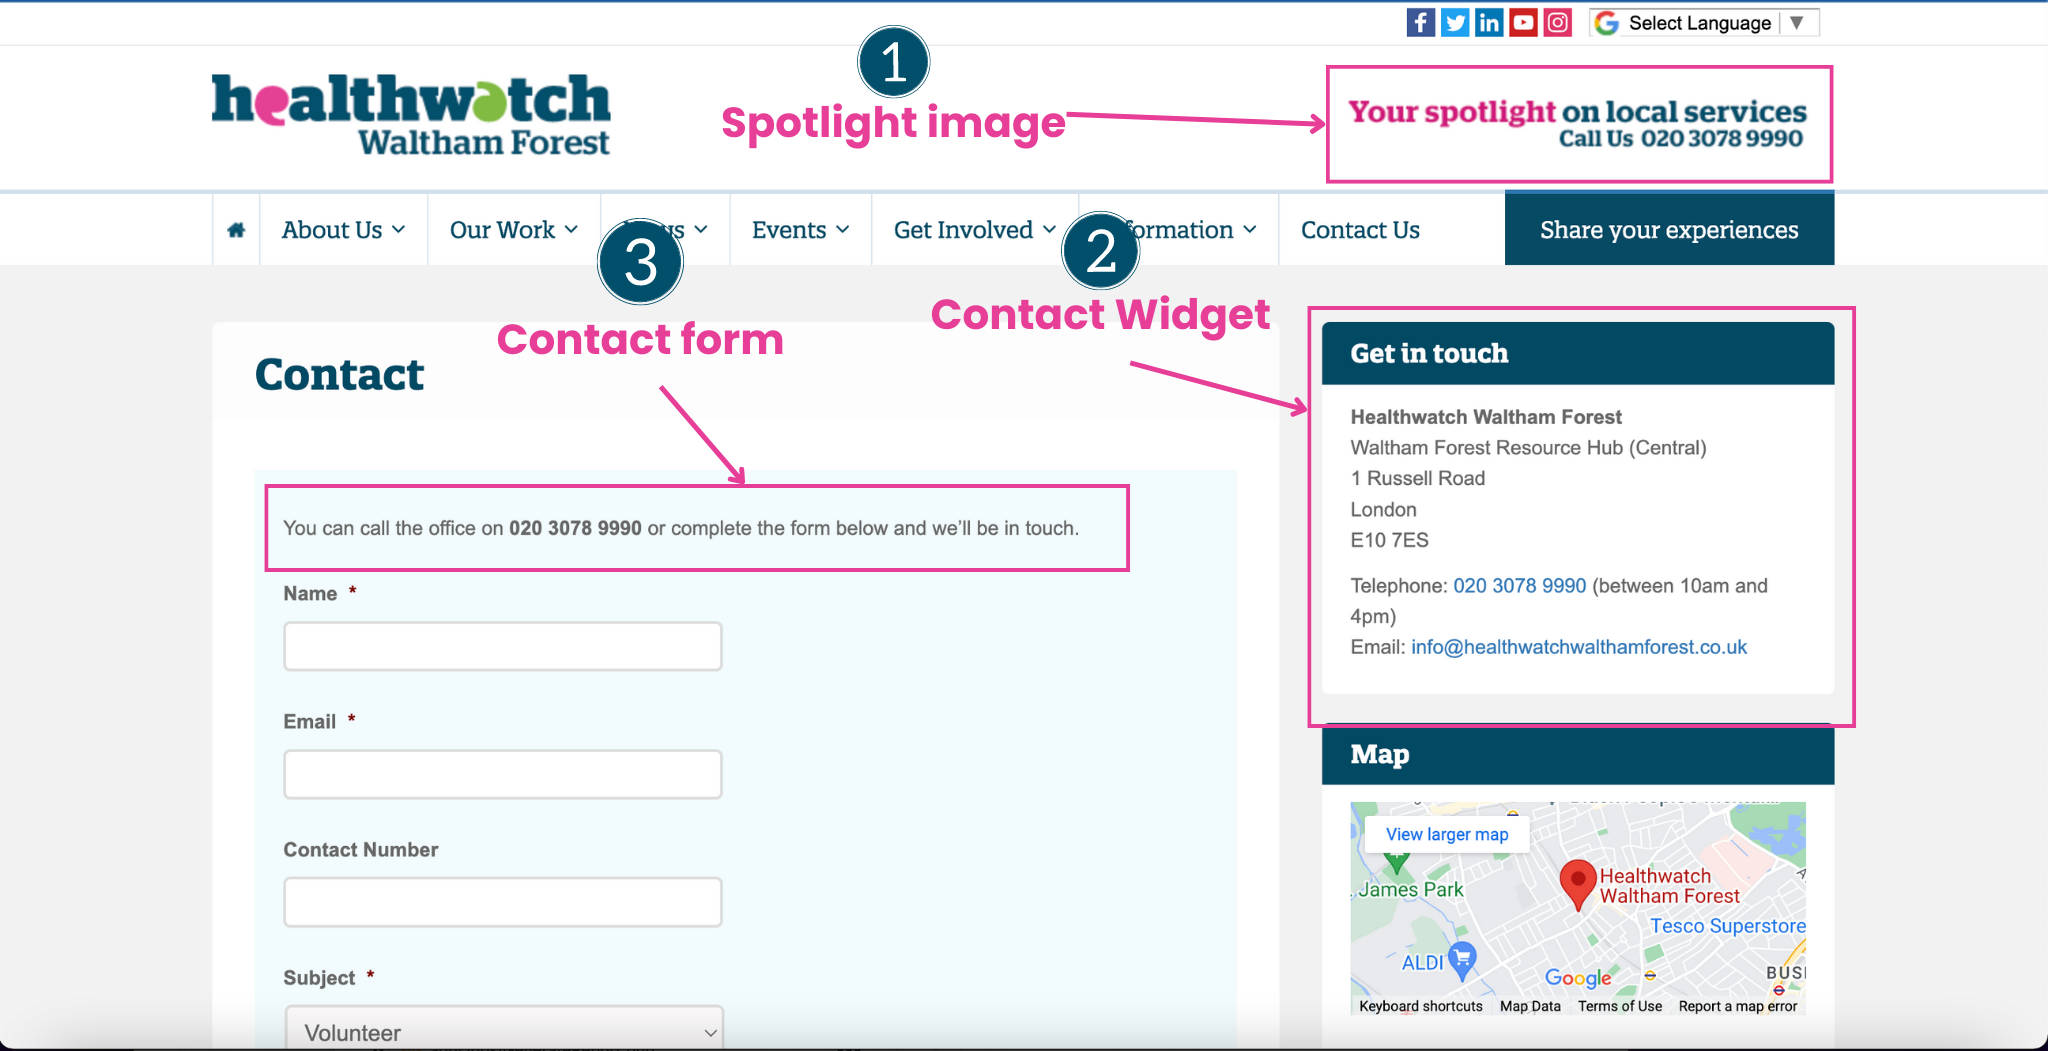
1) Spotlight image
This is the image that appears in the top right of your website. It looks a little bit like this (updated with the new Healthwatch branding font)

You need to create this image yourself (we recommend 330px X 40px in size), but if you don't have the tools to do so please use our Canva design here. Please remember to make a copy of the design before editing.
Once you've created your design you need to login to your Wordpress site. To access the login area, type in the website address and add /wp-admin at the end. You'll then be taken to a login screen where you'll need to enter your login details. If you haven't got access to the site already please contact a member of your team to create you one.
When you login you'll see the Wordpress dashboard and the dashboard menu will be on the right hand side. If you scroll down to the 'Options' button you should be able to click it and access some settings for your Feedback Centre (if you do not see this button its because you do not have the correct permissions to make this change, please contact the member of your team who generated your login).
The options button looks like this:

Once you've clicked it you should see a page like this:
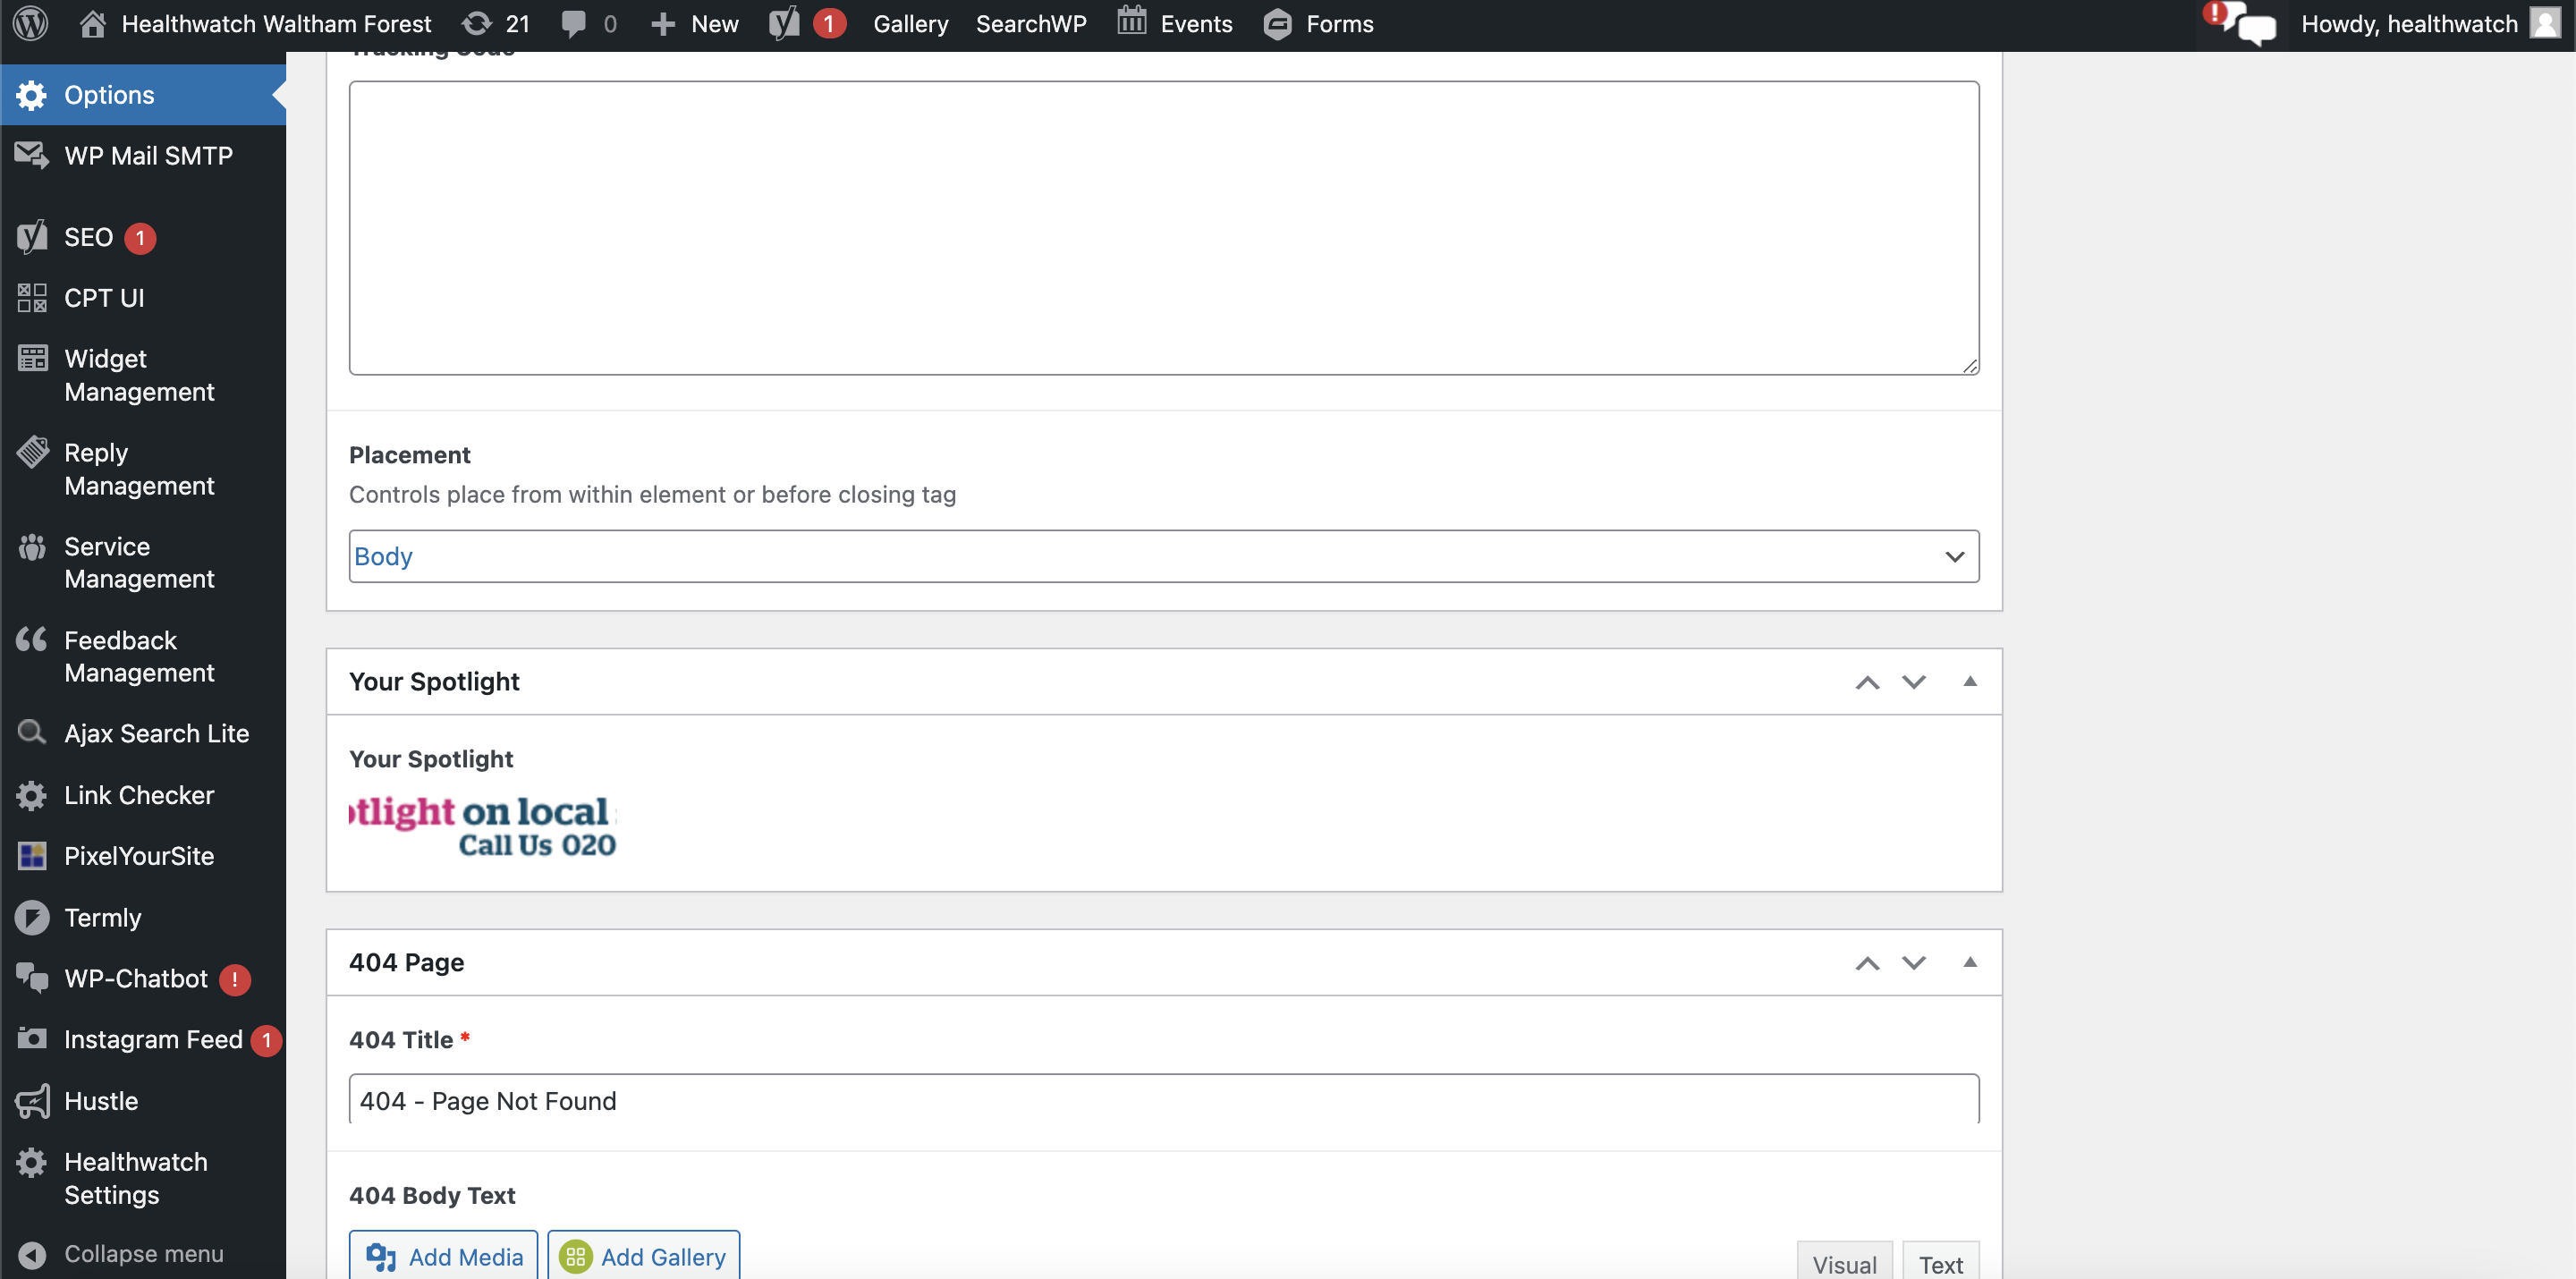
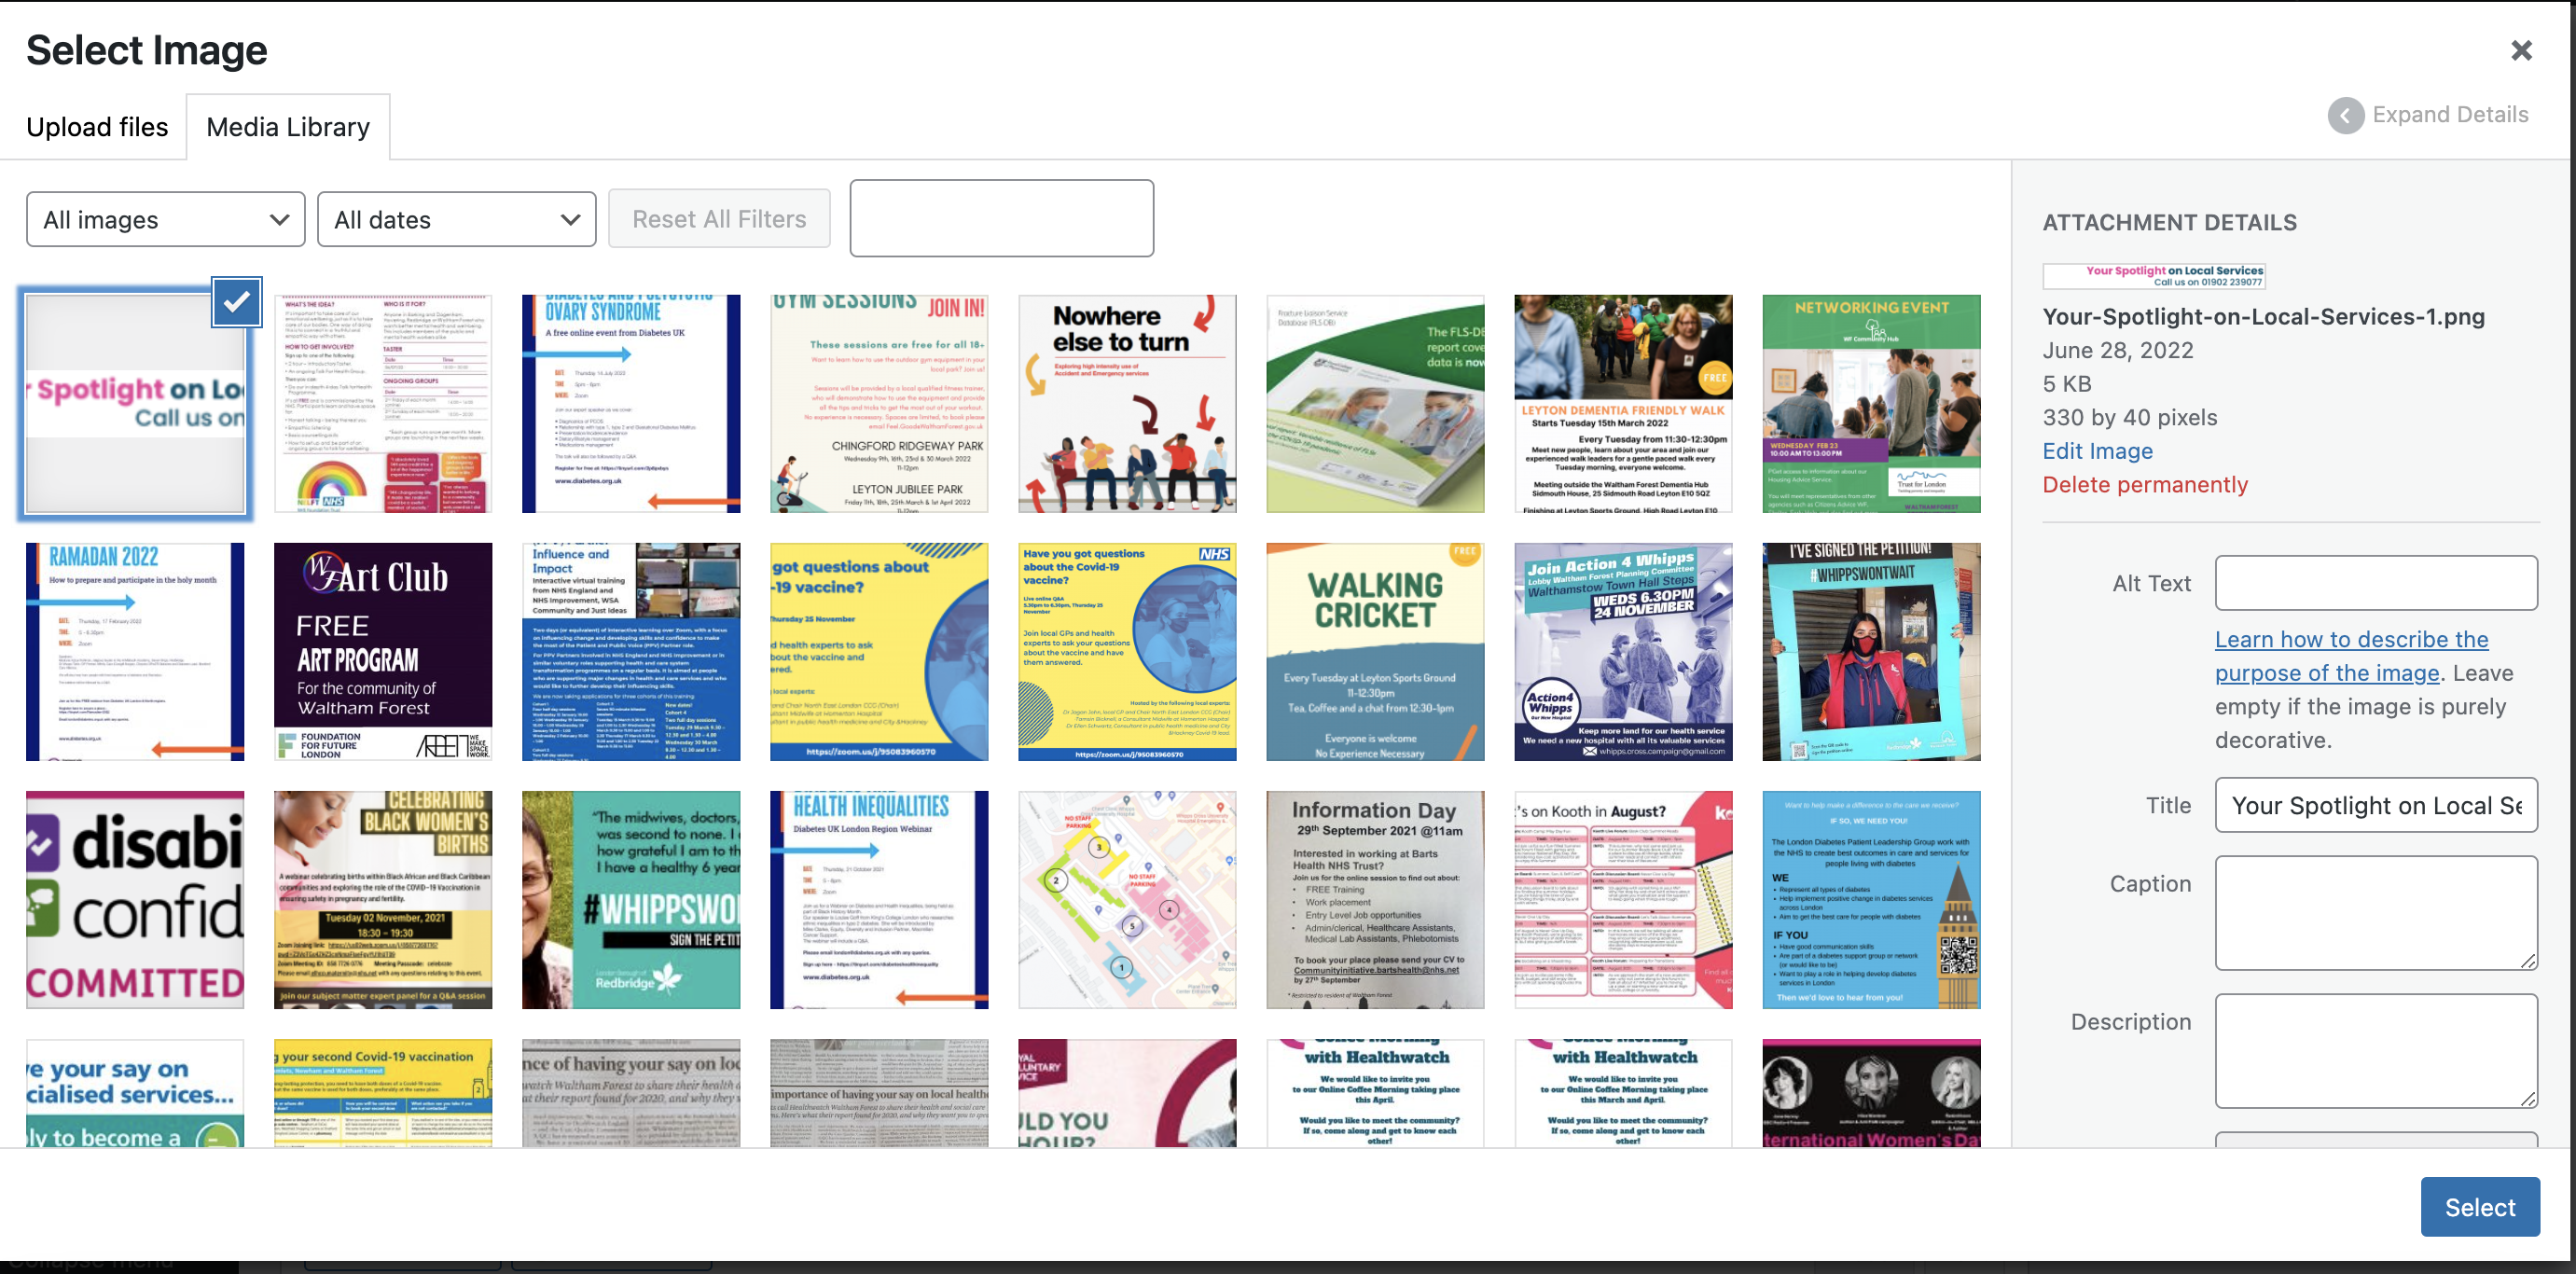
If you scroll down to the panel thats called 'Your Spotlight', if you hover over the image thats already there you can click the 'remove' button which will let you add a new one:


Once you've removed the image you can click 'Add Image' to add your new one. This will then open up the media dialogue box like so:
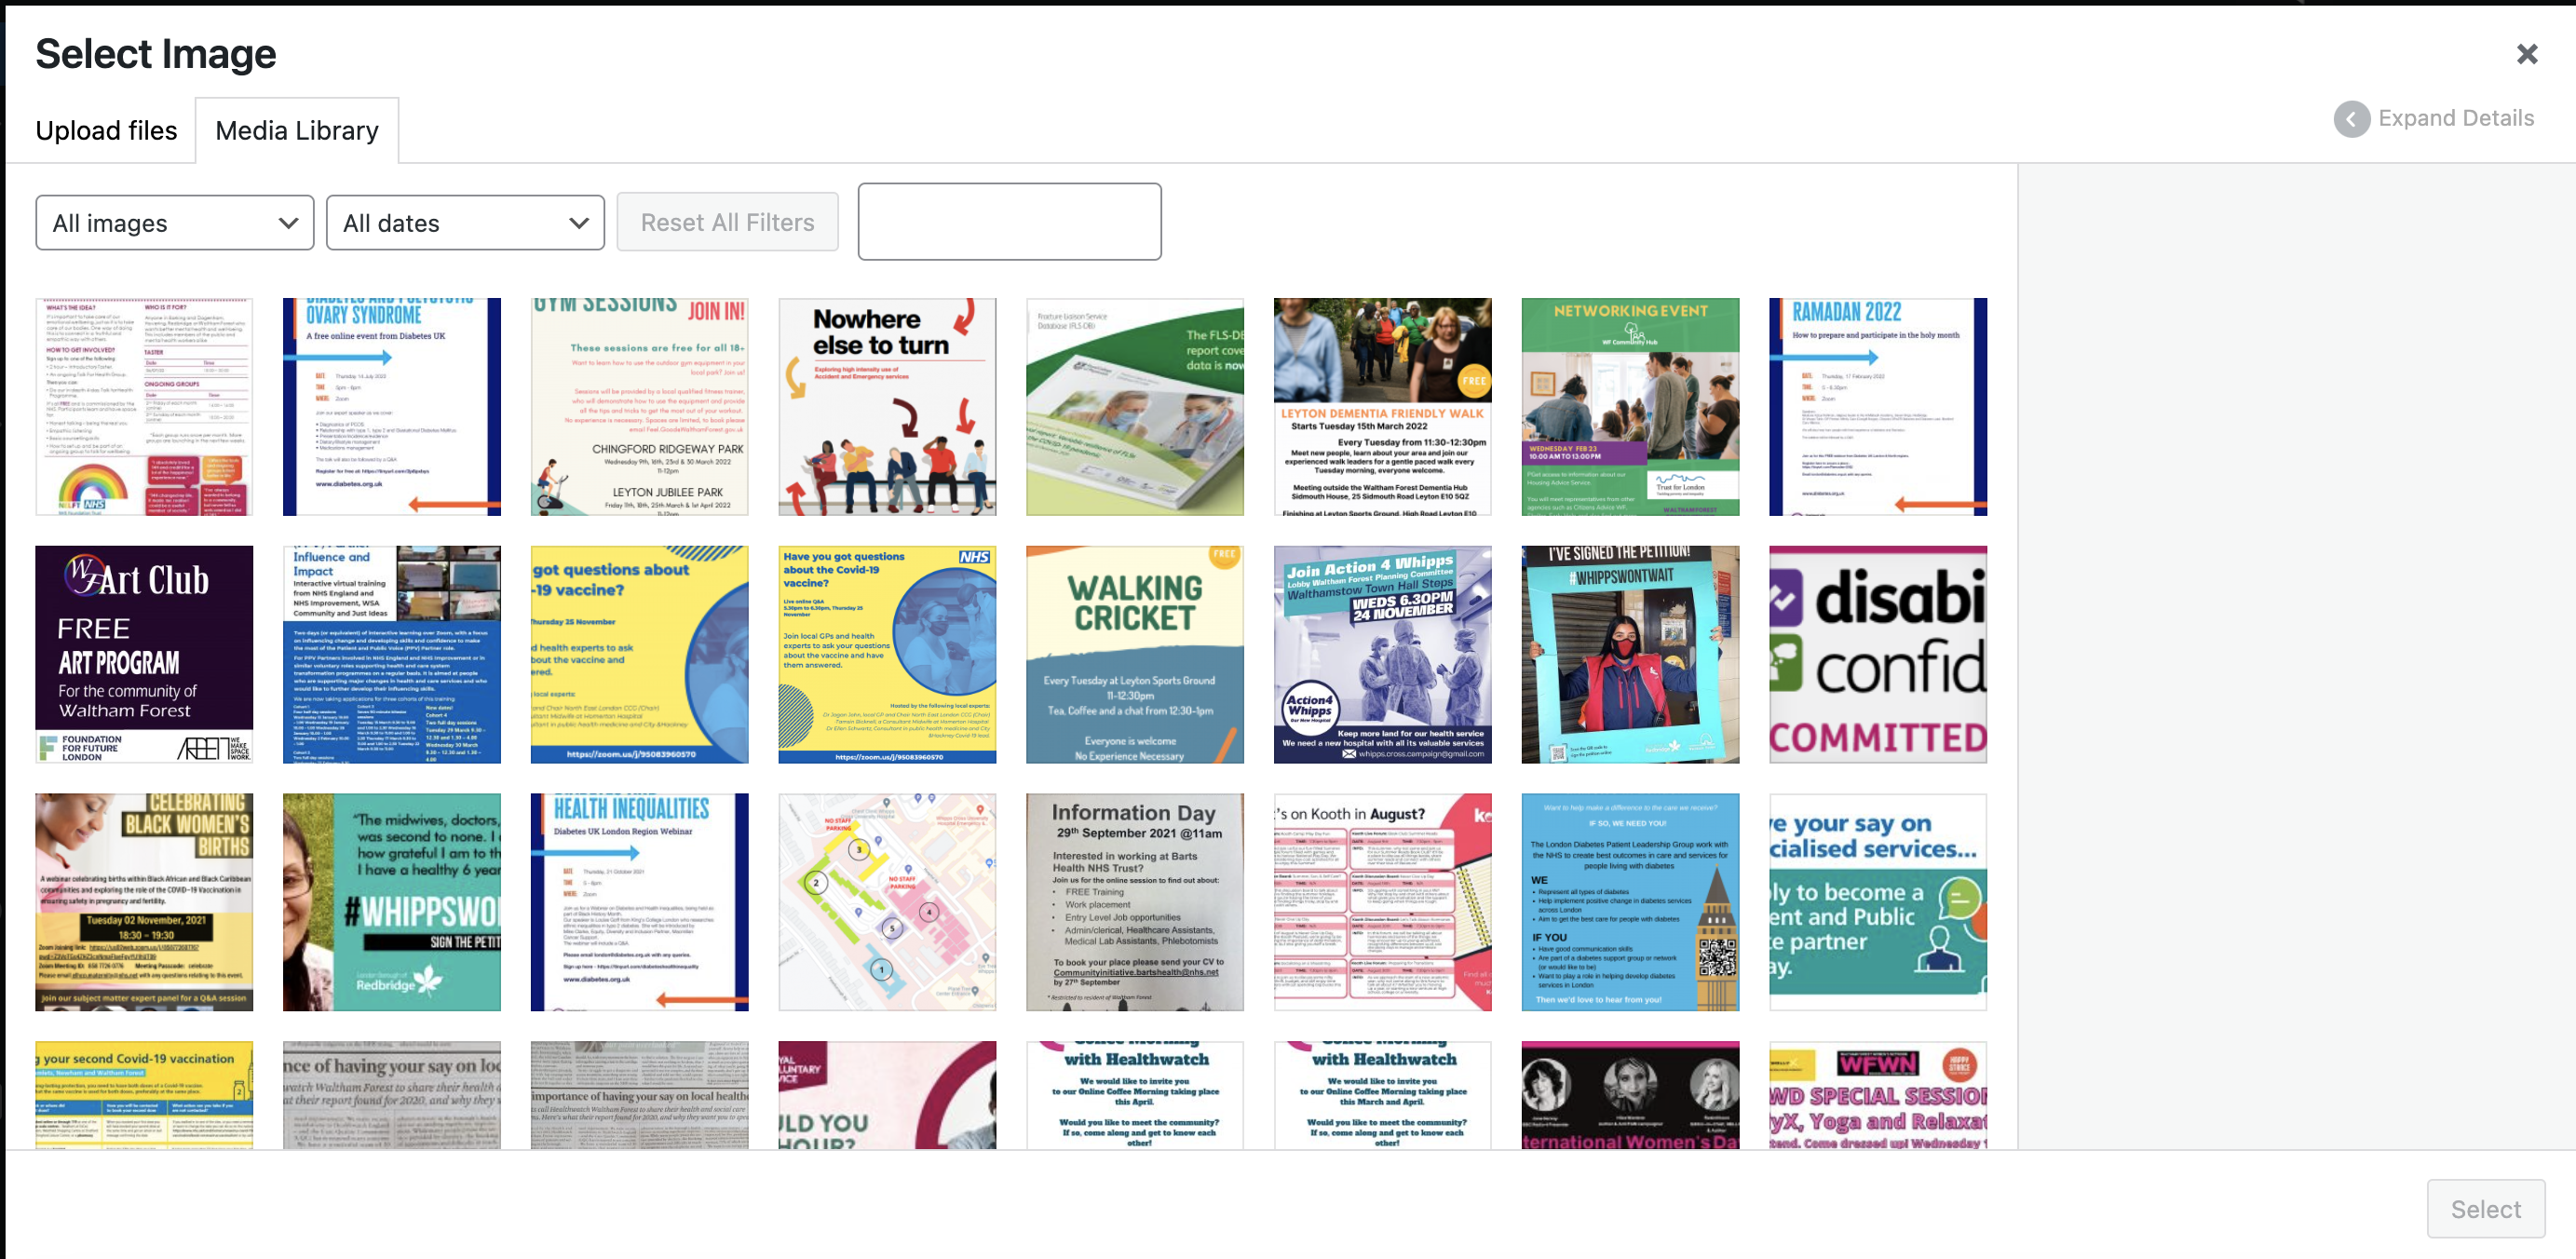
If you have already uploaded your image, it should be available in the media library, but if you haven't you'll need to click the 'Upload Files' tab at the top of the box.
If you click upload files you should see this panel:
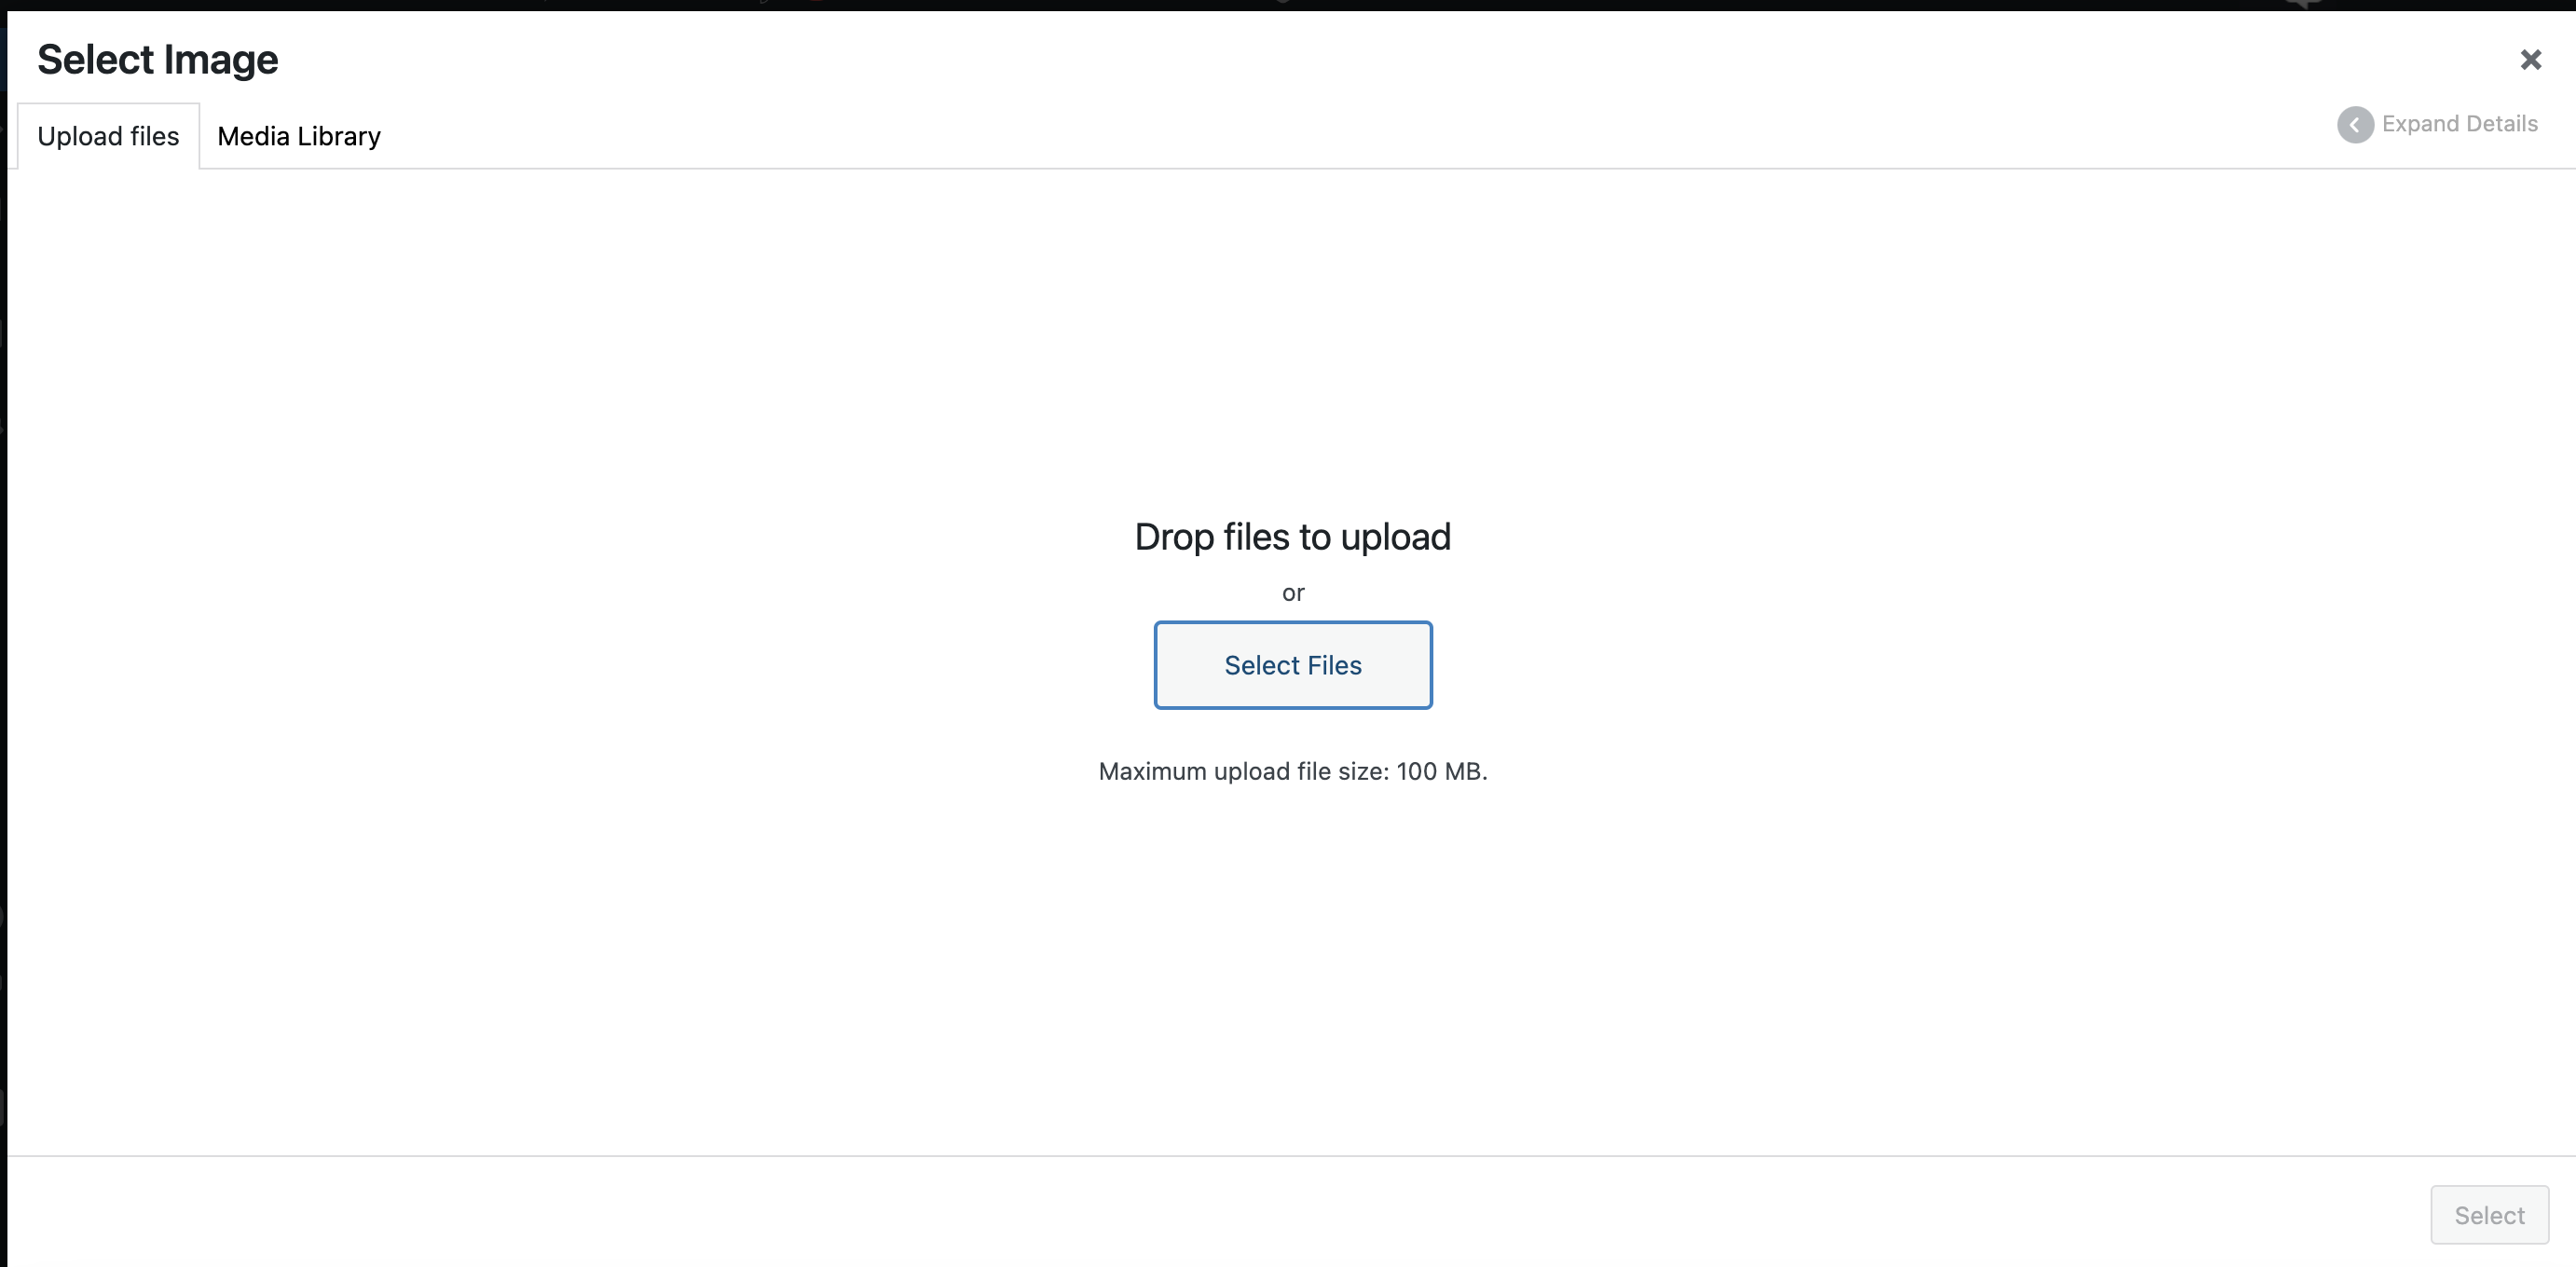
Click 'select files' or drag your file from your desktop and into the page to upload it. Once it's uploaded it should look like this:
Click the 'Select' button to add it as your spotlight image. Once you have done so the image will appear in the box like so:

There is one final step to make sure this image has been updated, please scroll back up to the top of the screen and click the following button:

You have now successfully updated your Spotlight image!
2) Contact Widget
To edit the information in the 'Contact Sidebar' you need to login to your Wordpress site and do the following:

This will take you to the following page:

Head over to the 'Contact Sidebar' box and click the arrow next to it.

There are two parts to the Contact Sidebar. The 'Get in Touch' box and the Map. To change the content in either box, click the title.
Editing the 'Get in Touch box'

Editing the Map
If you'd like to know how to embed your map from Google, please see this article

You have now successfully updated your Contact Widget.
3) Contact Form
To change the number in the contact form you'll need to click the 'Forms' button in the Wordpress dashboard:

You'll then be taken to this screen:
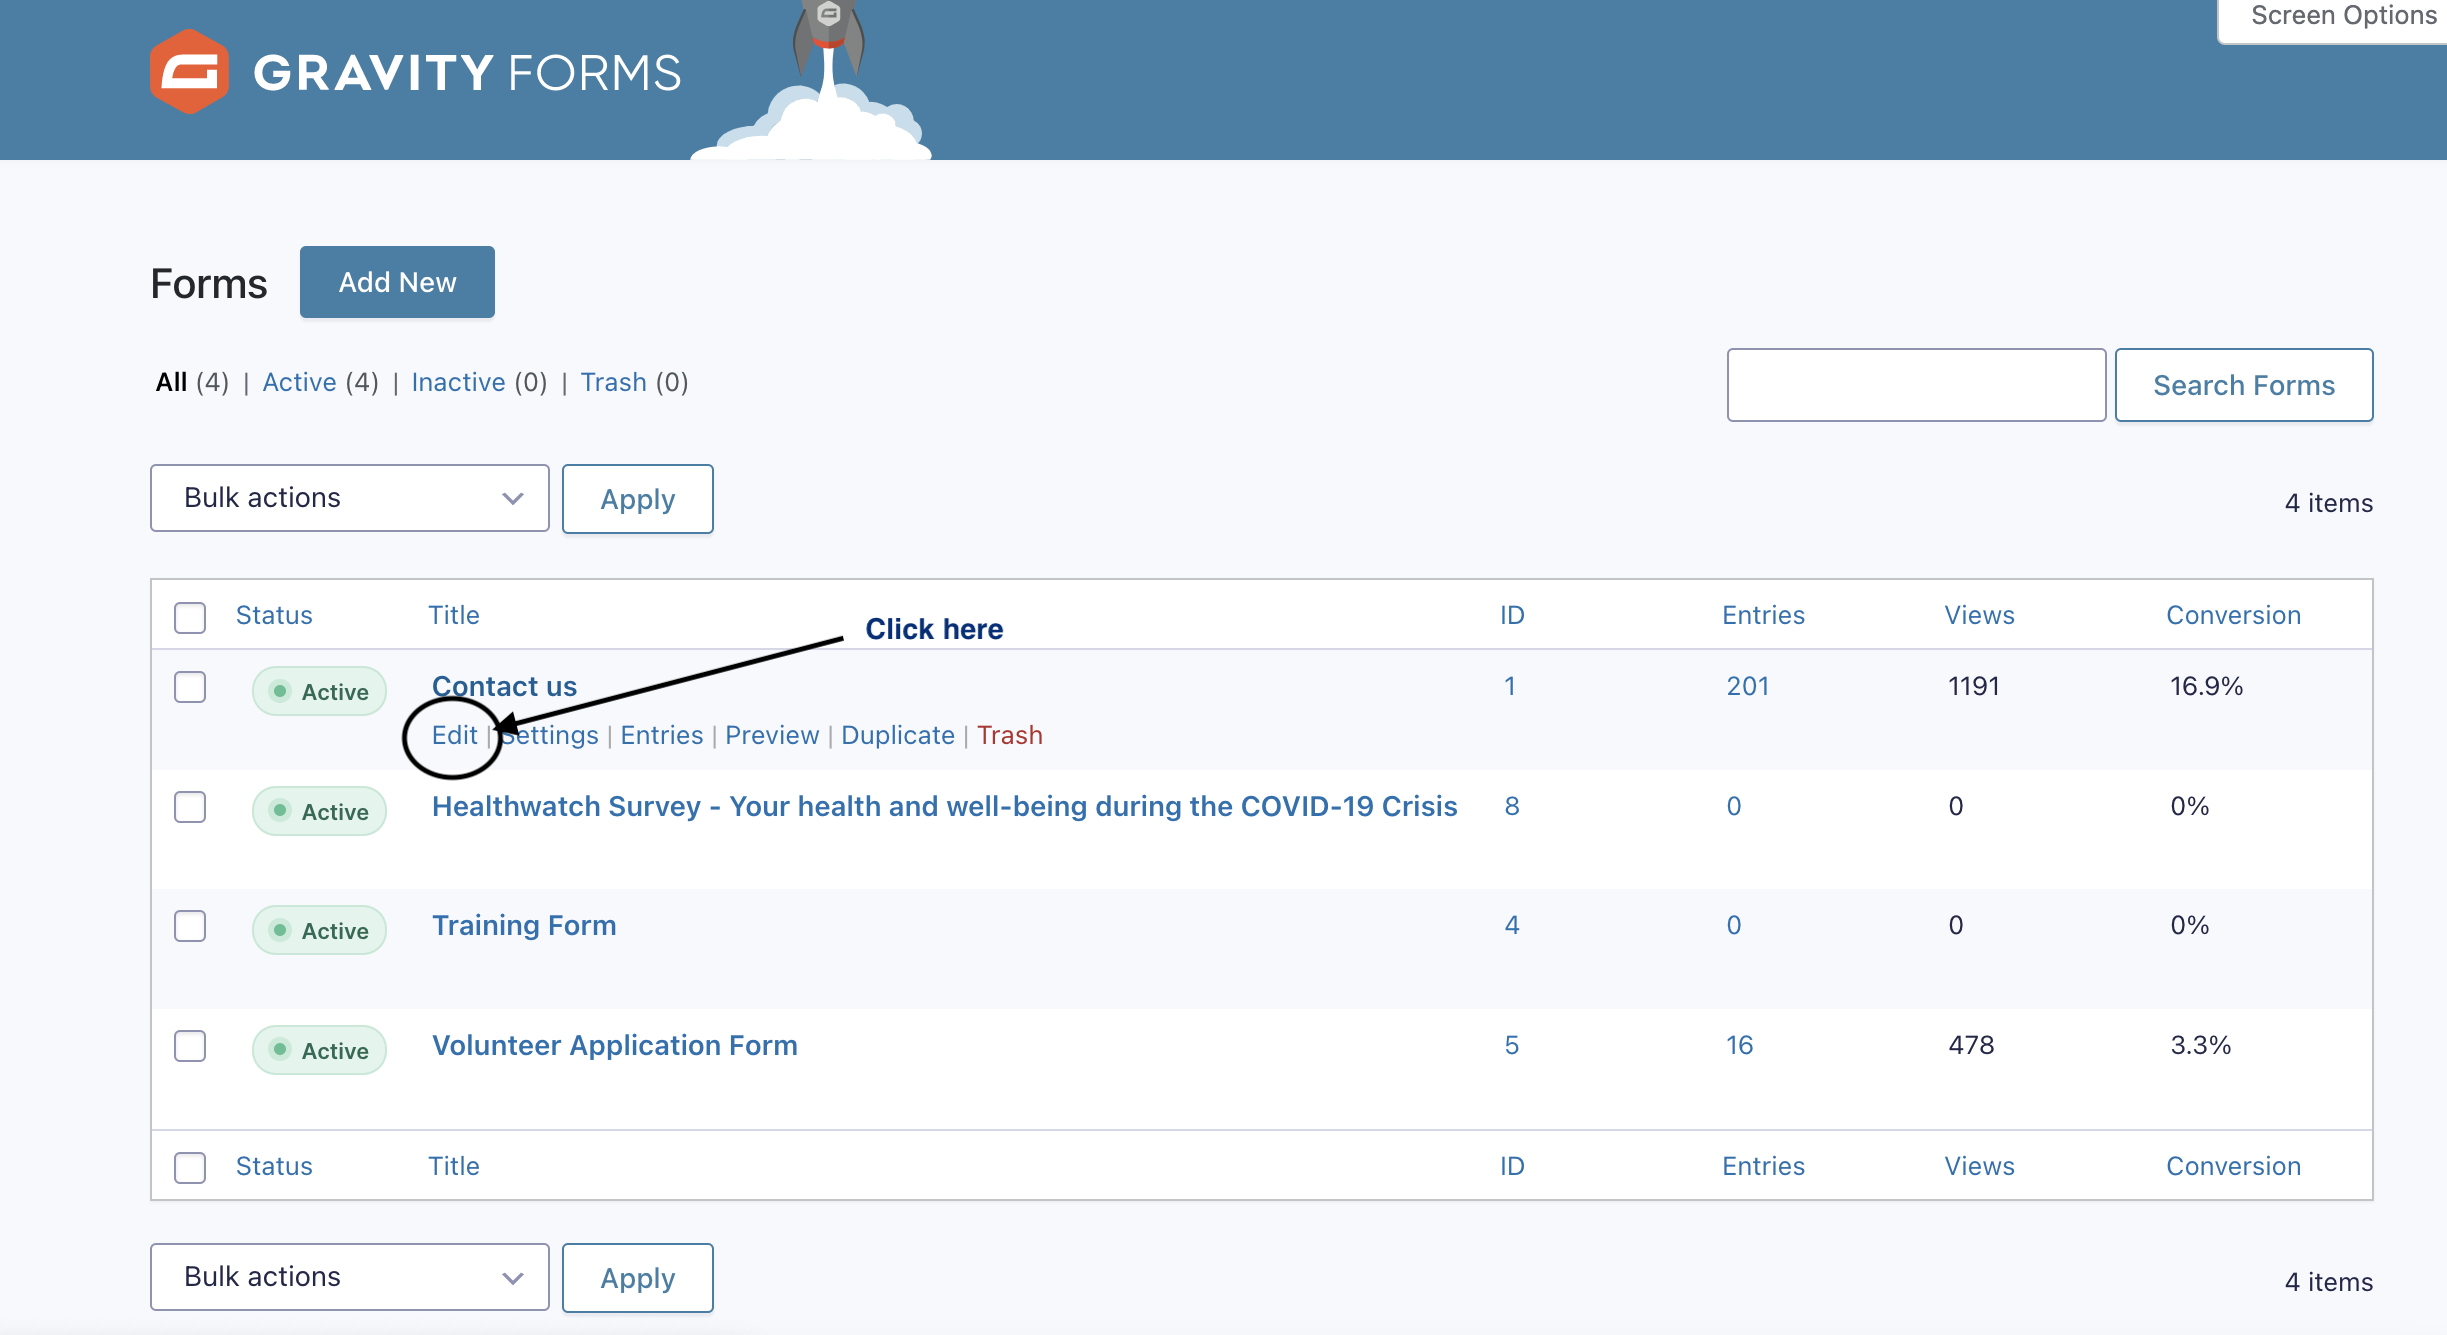
Please find the Contact Us form and click the 'Edit' button underneath. This will take you to this page:
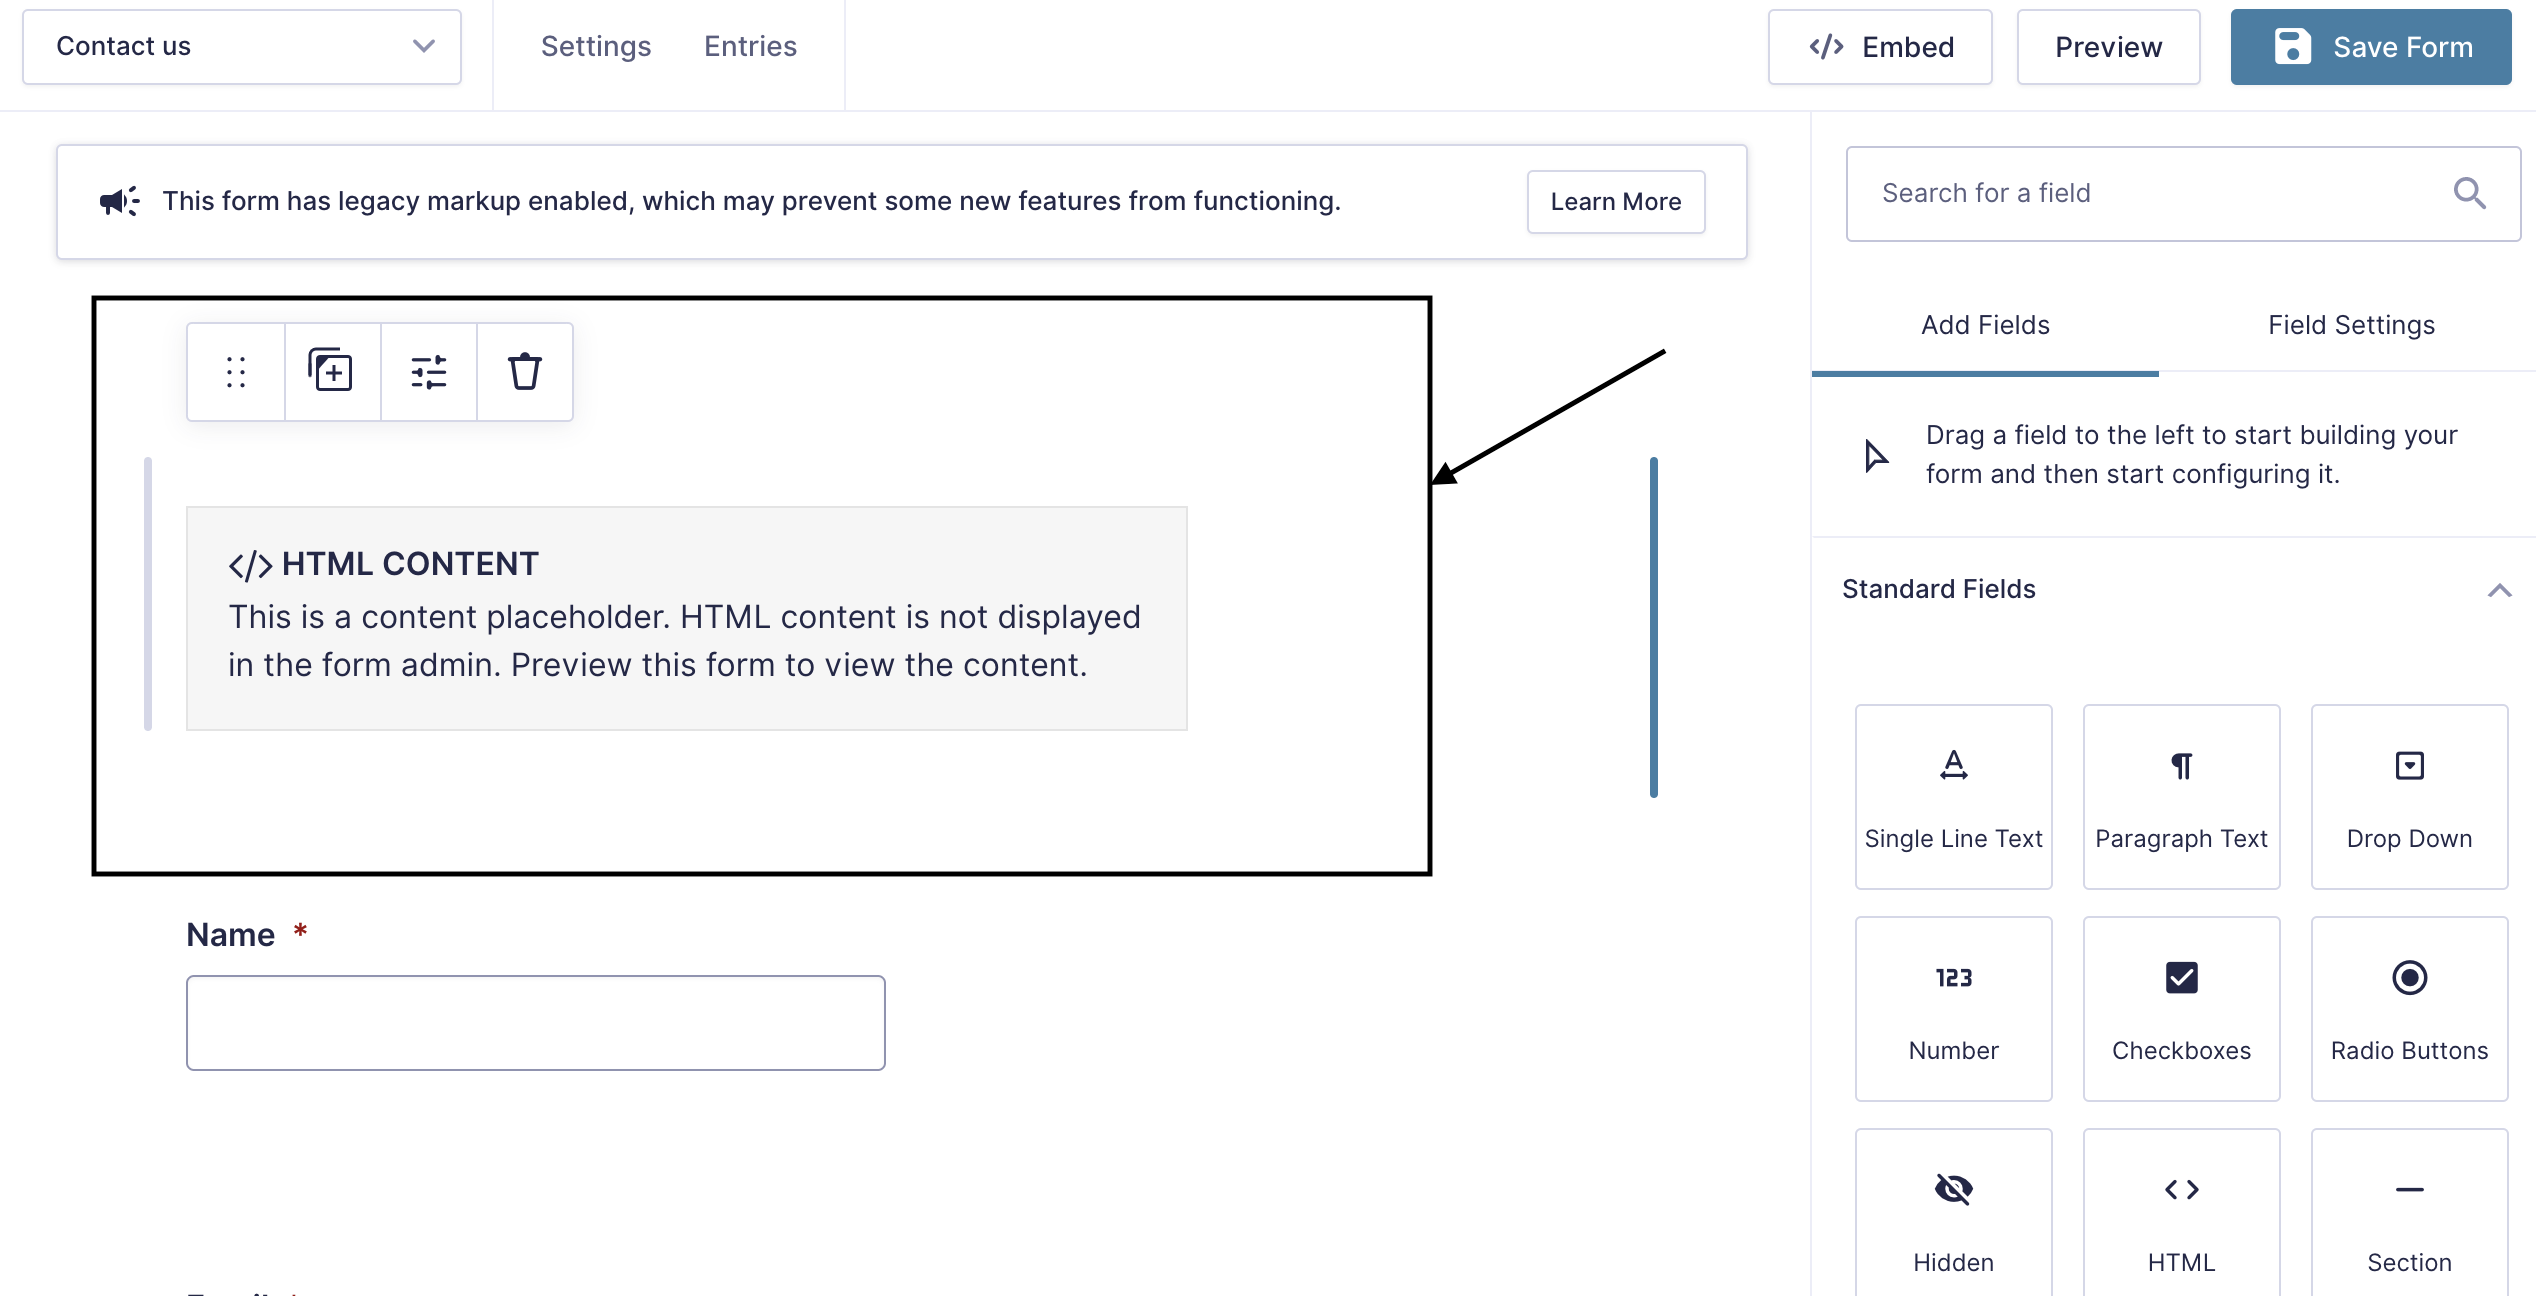
Click the 'HTML CONTENT' box at the top, although it might appear nothing changes when you click it, the settings you need to change will appear on the right hand side like so:
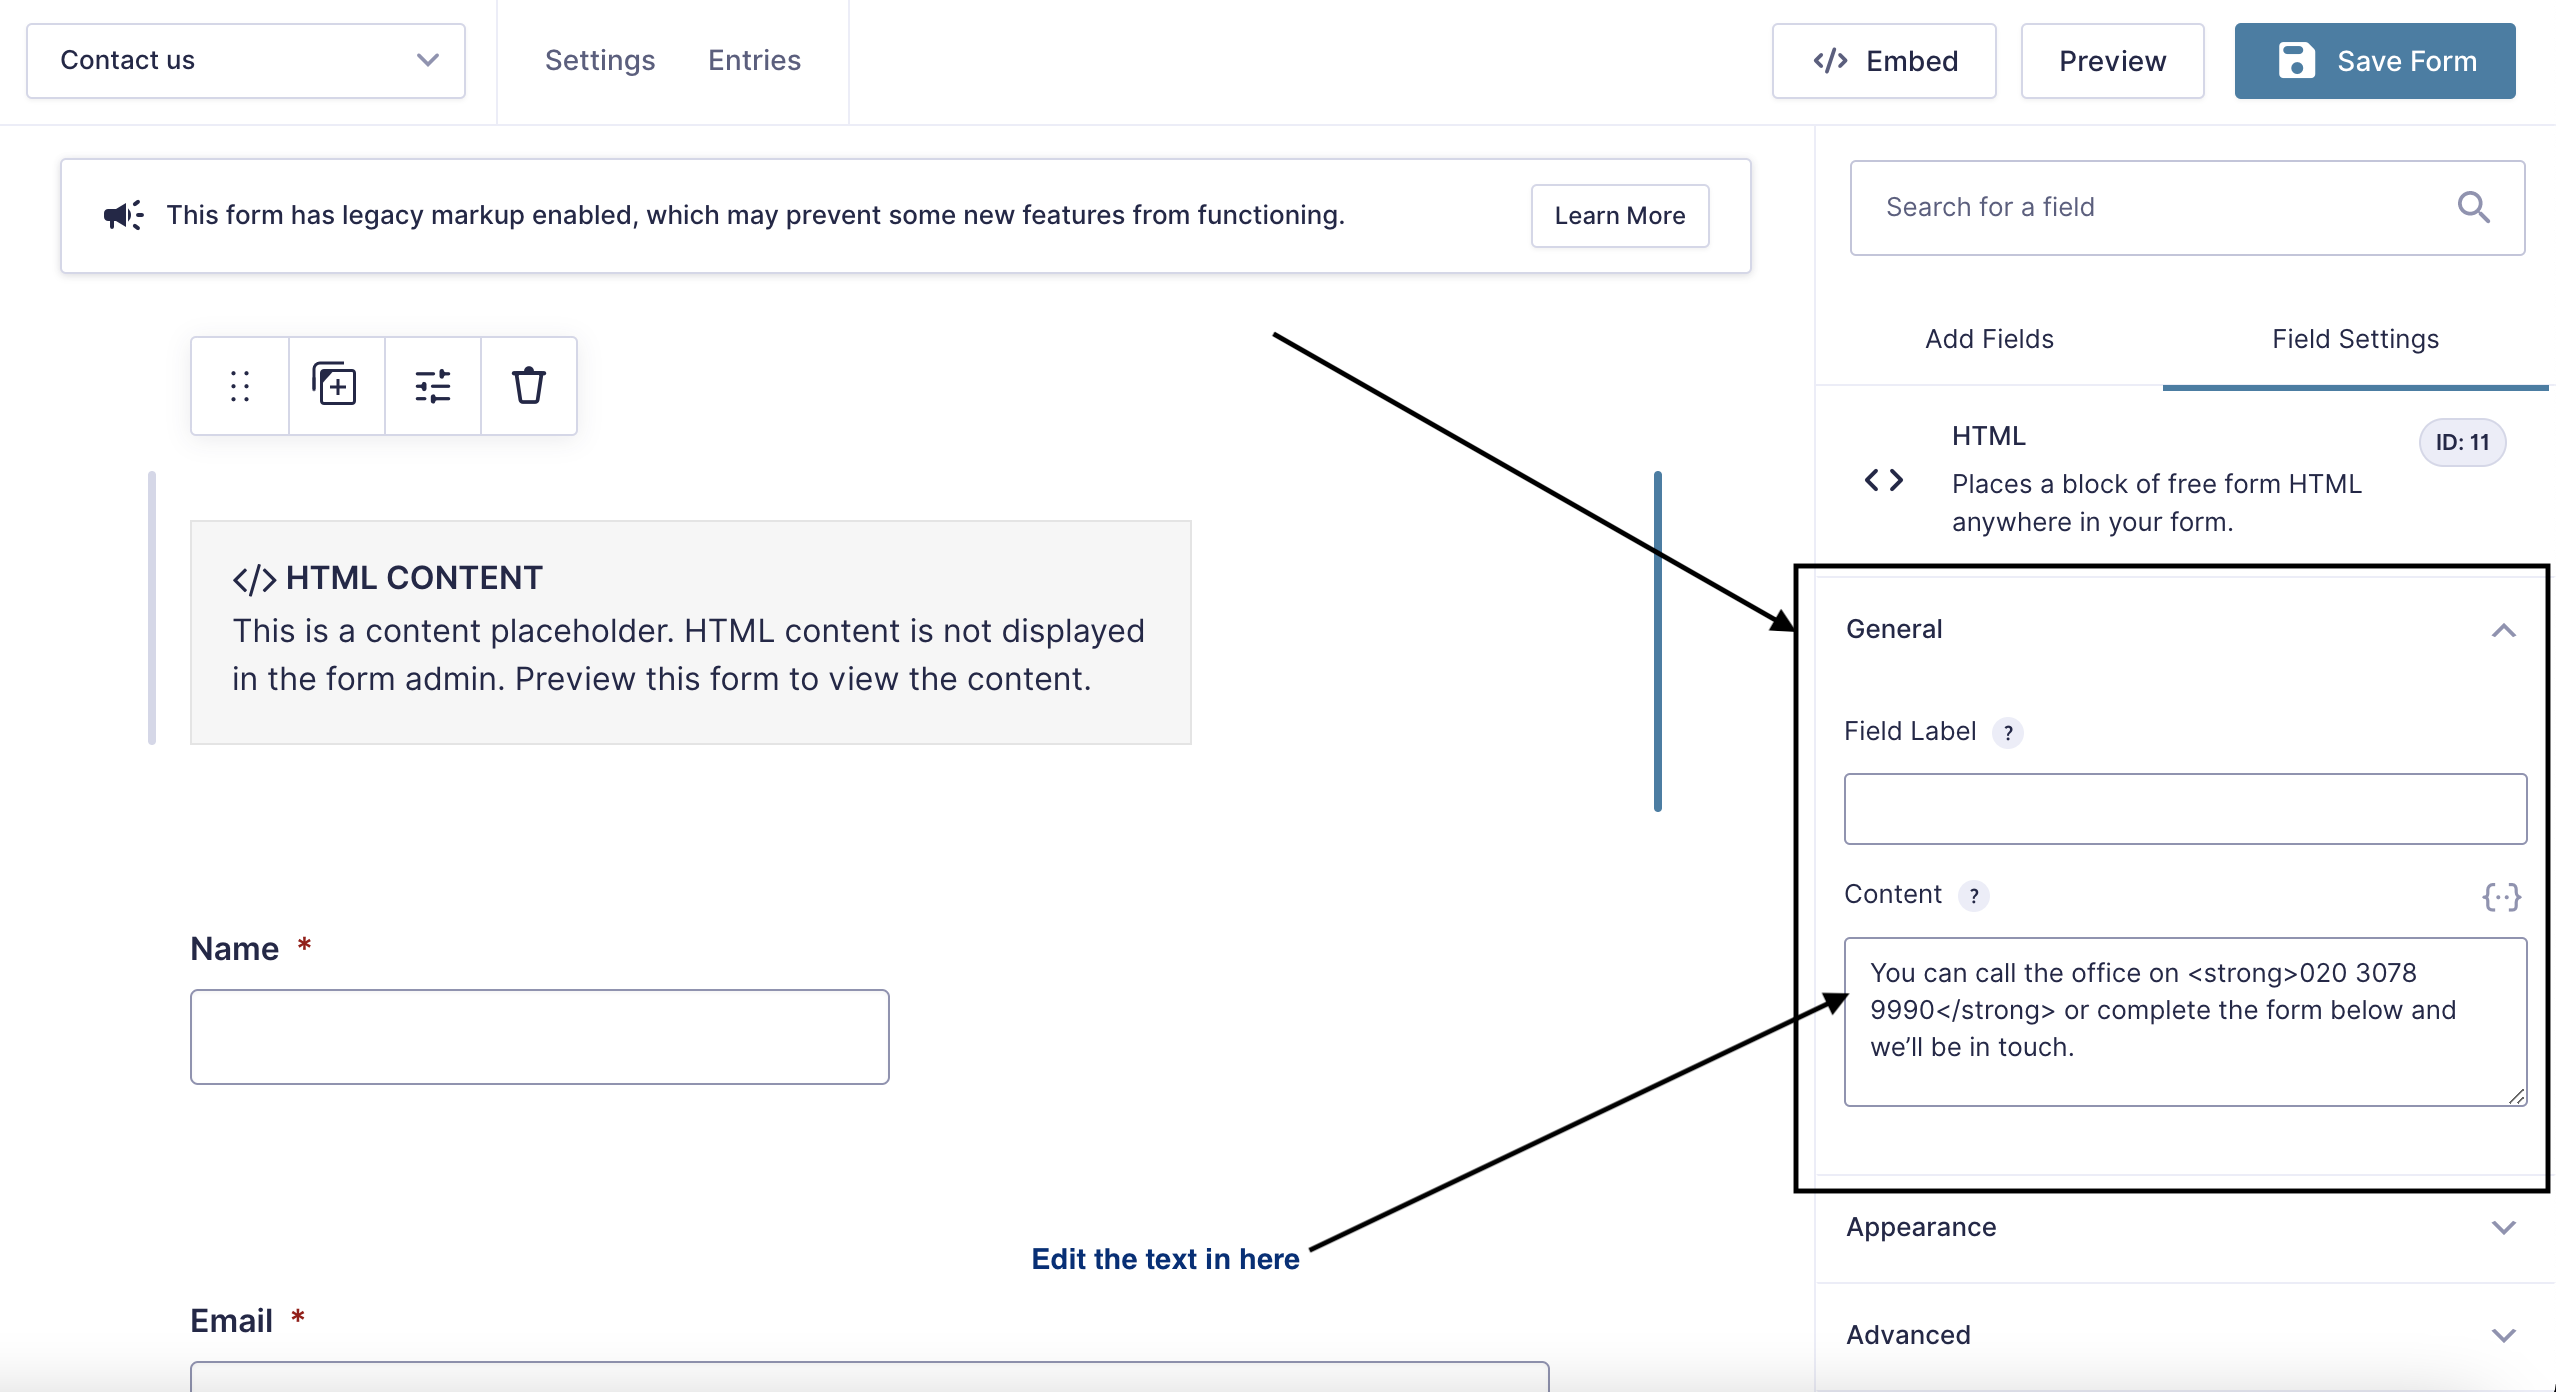
As you can see the 'Field Settings' are shown on the right hand side, if you scroll to the 'General' tab you'll see a 'Content' field that is fully editable. Simply change the phone number (or any other text) in there. Once you've made your changes, hit Save Form at the top:

You have now changed all of the contact details on your website!